How to Clean and Disinfect Your Home During COVID-19

How to Clean and Disinfect Your Home During COVID-19

Spring cleaning is typically the perfect time to sweep out the garage, reorganize the linen closet and wipe down the windows. But in Spring 2020, our cleaning goals are slightly different.

While shelter-in-place orders around the country may be giving families plenty of time to tackle those Marie Kondo-inspired tidying-up projects, these guidelines are essential to slow the spread of the novel coronavirus.

Here are some helpful cleaning strategies that may help you keep germs at bay, even if your family is in good health:

Protect Yourself

Remember to wear disposable gloves when you’re cleaning, and wash your hands before and after to help minimize the spread of germs. It’s also best to work in a well-ventilated space, as disinfecting chemicals can be very strong. Also, never mix cleaning chemicals as this can create toxic off gassing.

Clean First, Then Disinfect

The CDC explains that cleaning and disinfecting are two different things. Cleaning helps remove dirt, debris and other residue, whereas disinfecting helps kill bacteria and pathogens.

First, wipe down surfaces with a cleaning towel or soap and water to remove dirt. Then follow up by using an EPA-approved disinfectant or a diluted household bleach solution containing 4 teaspoons of unexpired bleach for each quart of water.

Your disinfectant will need to remain on the surface for a certain amount of time, so follow the manufacturer’s instructions. For a household solution, wait at least 1 minute.

Focus on High-Touch Surfaces

The CDC also recommends cleaning high-touch surfaces in high-traffic areas. These include bathroom and kitchen surfaces, faucets, doorknobs, hard-backed chairs, lightswitches, game controllers, computer keyboards and mobile devices.

Explore Cleaning Guides from HomeServe

If you’re like me and have become somewhat obsessive about keeping your house clean and wanting to try to keep the coronavirus at bay, check out the following HomeServe blogs for general cleaning tips and tricks that may help with hard-to-clean spots and surfaces.

Don’t forget to bookmark this post so you can come back to these helpful hints when next year’s Spring cleaning season comes around.

Cleaning Products to Use Around the House

Bathroom Cleaning Guides

Kitchen Cleaning Guides

Living Space Cleaning Guides

Prepare for the Unexpected With a Home Repair Plans

As you and your family follow shelter-in-place orders and spend more time at home, you’re counting on your essential home systems to stay in working order. Now, more than ever, your home is playing a major role as your living space, office, schoolhouse, play zone, fitness center and more. An unexpected home system breakdown could have consequences for all of these aspects of your life.

Being prepared for the unexpected with a repair plan from Service Lines Warranties of America is a good strategy.

What Is the Cost to Install a Water Heater?

What Is the Cost to Install a Water Heater?

A few months ago, I wrote about my water heater mishap. (I know I’ll never forget that feeling of a freezing cold shower). I’m glad to report that my new water heater is still providing our family with hot showers and clean laundry – but I’m always on the lookout for the signs it might need maintenance.

During the frigid winter months, it’s more important than ever to check in on your water heater. If you do catch a problem early on, or realize you need an entirely new system, you can be proactive in receiving repairs (and won’t be caught in a mid-shower frozen surprise).

From my experience, I learned that installing a water heater is half the battle – and the majority of the cost – of purchasing this essential system. Don’t settle for lukewarm showers and half-washed dishes. Here’s everything you need to know about the cost to install a water heater.

The tank vs. tankless debate

The fact of the matter is, installation costs depend on the type of water heater you need or already have. Home Depot breaks down two of the most popular choices for homeowners:

  • Traditional water heaters: Typically store between 20 and 80 gallons of water heated by gas or electric power. The average total cost for a new traditional water heater and installation is $1,308.

  • Tankless water heaters: Gaining popularity in recent years, these units are also fueled by gas or electricity but only heat water as needed. They’re accepted as being more environmentally friendly, though they come with higher upfront costs. The average total cost for a tankless water heater is around $3,000.

Total costs include everything from the unit itself, permits, materials, installation, labor costs and removal of the old unit. Thumbtack.com estimates the national average cost of installing a water heater ranges from $500 to $1,000.

What’s your fuel source?

Water heater installation costs aren’t just affected by the type of water heater chosen, but also by the fuel sources available. Both traditional and tankless heaters can use gas or electricity to warm up water. A gas water heater may cost $50-100 more to install than an electric tank water heater. Likewise, you can expect to pay $500 more for a gas tankless water heater than an electric water heater.

If you need – or want – to switch fuel sources, you’ll most likely need to add some room to your budget. Going from an electric to gas water heater may require the addition of a gas line, that usually costs $500 to install, reports Homewyse.com.

Other factors to consider

The size, model, home layout and any additional – necessary – work can all contribute to the costs associated with installing a water heater. Traditional water heaters may require expansion tanks to minimize the risk of pressure damage to the plumbing system. TheSpruce.com explains this is mostly needed in closed water supply systems, so always factor that into your water heater costs.

While tankless heaters come with higher upfront costs, they can require less maintenance in the long run and families can see energy costs decrease because water is heated on a need-only basis. Both kinds of water heaters have energy-efficient models available for more cost savings.

Though each system comes with its own unique costs, installation can also vary based on your needs and wants. Always make sure to do your research before deciding on the best water heater for your home and have a licensed professional install it.

See how plans from Service Lines Warranties of America can help with the costs of home repairs.

Thanksgiving Leftover Recipes Better Than the Holiday Meal

Thanksgiving Leftover Recipes Better Than the Holiday Meal

Remember that episode from Season 5 of “Friends” entitled “The One With Ross’ Sandwich” where Ross has an actual breakdown after someone steals his Thanksgiving leftovers? (One of my all time faves!)

Apparently, Ross had been looking forward to that Thanksgiving sandwich all year long – ‘cause it’s just that good.

While you binge on Netflix after the parade and pumpkin pie, wondering what to do with all those Thanksgiving leftovers, why not bookmark a few of my favorite post-Thanksgiving recipes?

My kids say these are better than Thursday’s turkey and stuffing — but I’ll leave it to you and yours to decide.

Breakfast

Try these low-carb stuffing waffles with a dollop of cranberry sauce. Or start your morning with Thanks Benedict, featuring stuffing cakes smothered in a sage hollandaise sauce, by one of my favorite chefs, Giada de Laurentiis.

For a weekend brunch with friends (and mimosas), I love making a sweet potato and kale frittata with creamy goat cheese, or this stuffing and turkey quiche.

The kids will adore breakfast sausage and stuffing bites — they’re so good you’ll want to pop a few before heading out for the Black Friday doorbusters.

Get a plan from Service Lines Warranties of America today

Soups and sandwiches

My favorite turkey soup is a creamy, one-pot recipe for turkey and dumplings. It’s a great way to use up whatever turkey meat and veggies you have left.

I also recommend this hearty leftover turkey chili recipe. With a bowl filled with leftover goodness plus edamame and a homemade spice mix, it’s a great way to help your taste buds (and waist line) transition out of the holiday weekend.

And, while you can easily throw together a turkey sandwich to relive the flavors of Thanksgiving Day, why not take it up a notch with a gooey brie, apple and cranberry grilled cheese sandwich? Simple but oh-so indulgent.

Savory pies

If you’re in the mood for comfort food, don’t miss this Thanksgiving shepherd’s pie. Or, remix the same festive flavors into a turkey pie with a cornbread stuffing crust.

I also can’t speak highly enough of Paul Hollywood’s ham and turkey pot pie. As seen on the Great British Baking Show holiday masterclass, it features a creamy sauce with leeks simmering beneath rough-puff pastry and looks as impressive as it tastes.

Get a plan from Service Lines Warranties of America today

For something quicker, pop these easy Thanksgiving leftover hand pies into the oven. They’re made with store-bought pie crust and the kids will enjoy crafting their own homemade hot pockets.

Pizza

Leftover pizzas are a serious crowd-pleaser! Layer up turkey and sides into a Thanksgiving pizza baked in puff pastry. This version is topped with fried onions for an extra crunch.

My kids always request this yummy mashed potato pizza with leeks and bacon crumbles, but I also like to make up another pizza with turkey, cranberries and barbeque sauce for the grown-ups.

Before you get busy using all your appliances in the kitchen, it’s a good idea to have an appliance home warranty plan in place – just in case there’s a breakdown. See how plans from Service Lines Warranties of America can help with the costs of home repairs.

DIY Shower Pressure Fixes

Low or declining shower pressure may be a frustrating situation. Fortunately, most of the causes of low shower pressure can be fixed quickly, easily and without a lot of personal expertise.

To determine the culprit behind this issue, there are a number of places to look. The best place to start is in the shower itself.

Here are some DIY shower pressure fixes you can complete without the assistance of a plumber:

Remove shower head sediment

Older homes may experience water pressure problems due to years of sediment build-up in the shower head.

You may be able to clean out an older shower head with a simple life hack: An eight-hour soak in vinegar. Inspect the shower head afterward to see if that fix solved the problem and clear any remaining debris manually. If you’re still experiencing low shower pressure, it’s probably time to buy a new shower head.

Adjust necessary valves

If you just moved into a new home, you might find the pressure isn’t to your liking because the builder or previous owner installed a low-flow shower head. Try removing the flow regulator to improve the water stream.

If the problem persists, the low shower pressure may be the result of a water-restrictive shower valve instead of the shower head itself. Adjusting the central shut-off valve may increase the pressure.

Check with your water provider

For homes that get their water from municipal sources, there may be a problem with the amount of water flowing into the property as a whole.

You can increase the flow of water into your home either from the curb-side main or via the one coming into the house. This should be done carefully, however, and may require a call to your water provider.

Look for leak

In some cases, valves themselves could be the source of the problem. If decades-old pipes start to leak, you’ll encounter reduced water pressure in not only the shower, but also throughout the whole home. However, those issues may only present themselves in the shower. If you have low water pressure in your home overall, you may have bigger issues to deal with, like an issue with your water service line.

If you discover any leaks in your home plumbing system, you can attempt to patch them up – if the pipes are relatively new – with little fuss. All you’ll need to do is shut off the water to that pipe, make sure it’s dry and apply either a tape- or epoxy-based sealant, available at most hardware stores, to the affected area of the pipe. Some patches may not be advisable for lines that supply drinking or shower water, so check the packaging to make sure you get the right one.

When You Might Need to Call a Professional

As we have discussed, many low shower-pressure issues can be fixed on your own with a quick trip to the local hardware store to buy a replacement shower head or valve, and a few DIY how-to videos.

Once you have completed these repairs by yourself, it’s a good idea to plan for the future. Should you have any future problems, having a home warranty for your interior plumbing and draining system is a good idea.

See how plans from Service Lines Warranties of American can help with the costs of home repairs.

Reasons to call a professional plumber

Not sure if you need the help of a professional plumber? If the issue falls under one of these scenarios, you should definitely call a professional for expert help.

When the water pressure is low

If the water in your home isn’t flowing at its normal pressure, there could be a blockage or leak in the system, fractured pipe or eroded waterline. It can be difficult for the typical homeowner to pinpoint an issue like this. A plumbing professional can identify the source of low water pressure and advise on appropriate solutions.

When there’s no hot water

If your water isn’t heating up efficiently, it’s likely a water heater problem. As these units run on electric or gas systems, it can be dangerous to do repair work on your own. Similarly, if there is no water at all, call a professional to determine the cause.

When you notice severe pipe issues

If you think you have blocked, burst or frozen pipes, call a plumber immediately. Look out for signs, such as strange noises when the tap runs, sewage smells coming from faucets, lack of water or frost on exposed pipes.

Blockages are typically caused by sediment buildup or large debris in the sewer line. DIY attempts to fix these issues can cause more damage, resulting in a much larger repair bill. Even worse, a failed repair to a broken sewer line can cause issues for an entire neighborhood.

When you hear concerning noises

If you hear an extremely loud noise coming from the pipes, it may be a sign that something in the system is broken or about to break. If you hear a gurgling sound coming from the drains or pipes, it can be a sign of a clogged or compromised plumbing system. The sounds will likely appear when you’re using the toilet, shower, washing machine or dishwasher. If you hear these sounds, turn off the water immediately. This step will prevent the system from backing up into the house until the plumber arrives to inspect the issue.

When you’re doing a home renovation project

If you’re renovating the bathroom, kitchen, laundry room or other areas of the house that involve plumbing, make sure you get professional advice before starting the project. Relocating or installing plumbing-related items, such as sinks or dishwashers, requires the correct placement of supply lines and drains. A plumber can tell you if your renovation plans are feasible and ensure you have the proper permits. With that advice, you could save money on a potential repair or re-installation.

When you notice water damage

Look out for signs of water damage, such as leaks, water stains and mold growth. It’s ideal to catch water damage before the mold growth gets too severe, as the fungus is a health and safety hazard. A plumber can determine the source of the moisture and perform appropriate repairs to prevent further mold growth.

When DIY solutions aren’t enough

There are easy DIY fixes to many common plumbing issues, such as leaky faucets or clogged drains. Keep these plumbing do’s and don’ts in mind if you are attempting to repair the issue on your own. However, if the problem persists even after you’ve tried to fix it, a more serious problem may require expert plumbing knowledge to repair.

If you’re uncomfortable performing DIY plumbing, never hesitate to call a professional – even if it’s for a simple fix. A mistake could lead to a more severe issue, so it’s better to save yourself the hassle and get it fixed properly the first time around.Being prepared before home maintenance issues arise is always a good strategy. 

See how plans from Service Lines Warranties of American can help with the costs of home repairs.

DIY plumbing: How to install a toilet

If you’re ready to put your handyman skills and toolbox to use, a toilet installation is a relatively simple job to start stretching your DIY muscles. Here are some tips you need to know about installing a toilet on your own.

Reasons to take on the project:

  • Replace or upgrade an old toilet
  • Remove and replace during remodeling
  • Save water and energy

If your toilet troubles are persistent, such as excessive clogging or cracking porcelain, the best option is to replace it. You can save money on your water bills by upgrading your unit to a low-flushing, energy-efficient model. According to the Environmental Protection Agency, toilets are responsible for 30 percent of a home’s average indoor water consumption. Look for the EPA’s WaterSense label for high-performing, water-efficient models. Be sure to measure your bathroom before purchasing so the new toilet will fit in your space.

How to remove the old toilet:

Keep your safety in mind, and try to avoid breaking the toilet as a way to remove it. Plus, if it isn’t in terrible condition, you can sell or donate the unit.

Here’s how to dismantle the toilet without breaking it:

  1. Turn off the water supply. The valve is on wall or floor behind the toilet.
  2. Drain all the water from the bowl. Start by flushing the toilet, then use a plunger, small cup or sponge to remove any excess water.
  3. Disconnect the supply line. Use a wrench to carefully release it.
  4. Remove the tank. Start with the lid, and then use a wrench to loosen the bolts at the bottom of the tank. Lift it straight up, but gently twist it side to side if you feel resistance.
  5. Remove the bowl.Take off the bolt caps at the base of the toilet, then use pliers or a wrench to remove the bolts. Gently rock the bowl back and forth until you can pick it up entirely.
  6. Clean the floor. Use a putty knife to remove any gunk from the floor and around the mounting flange. Wipe down the surface before installing the new toilet.

 How to install a new toilet:

Just like removing the old one, you’ll install the new one in pieces. Make sure to read the manufacturer’s instructions for any specific guidelines.

  1. Place the wax ring on the flange. Pro tip: Lowe’s recommended making sure the ring is warm before placing it, as it will be softer and easier to work with.
  2. Set and secure the bowl. Place the toilet bowl onto the flange, aligning it with the bolt holes. Place a washer and nut on each bolt, and tighten into place. Alternate from side to side to make sure you tighten them evenly. Be cautious of over-tightening, as this can crack the porcelain. Place the bolt caps, and use a sealant around the base of the toilet to secure its position.
  3. Install the tank. Follow the manufacturer’s instructions for placing the rubber gasket (if it’s not already installed.) Insert the mounting bolts through the inside of the tank, and then place it into position. Alternate tightening the bolts, like you did on the base.
  4. Secure the toilet seat. Follow the manufacturer’s instructions.
  5. Reconnect the water supply line. Turn the water back on, and then flush the toilet to test your work.

Not everyone is a DIY type, but if you are, it’s definitely worth a shot. If during the task you find yourself becoming increasingly frustrated, don’t hesitate to call in a professional. Serious plumbing issues can become a huge inconvenience, so it’s never a bad idea to have a certified plumber check out the problem.

See how plans from Service Lines Warranties of American can help with the costs of home repairs.

A Homeowner’s Guide to Mold Removal

As a homeowner, you’re bound to deal with troublesome maintenance troubles. However, spotting problems early can help minimize the severity of the issues and protect your wallet from the burden of significant home repairs.

To catch and help avoid mold-related issues, here’s what you need to know about removing this common fungus from your home:

What is mold?

While it can be a nuisance inside your home, this fungus is a natural part of the environment. Mold can grow almost anywhere – on plants, food, wood, paper, carpet and tile grout – as long as there is moisture in the area. You’ve probably seen it darken the grout lines in your shower or build up on damp outdoor decks. The most common type of mold is mildew, which starts as little black spots and grows into a larger infestation. Black mold can be furry and possibly toxic, so homeowners should take extra precautions when trying to remove it. There’s also hidden mold, which you can usually smell even if you can’t see it.

Mold can occur at any time throughout the year, so, unfortunately, you and your home are always vulnerable. The fungus can cause health issues for you and your family, including allergic reactions, asthma and skin irritations, so it’s important to remove mold before it gets to be severe.

Can you clean mold?

With the right tools and precautionary measures, you can usually clean the surfaces where mold develops. Always wear a mask, goggles and gloves while cleaning to limit your exposure to the mold.

The first step for DIY mold removal is to dry the surface and vacuum any dust or debris. Then, scrub the mold off the surface with a bristle brush and mold cleaner, rinse and dry the area completely. For light surfaces, such as tile grout, you can use diluted chlorine bleach to remove the mold. According to The Maids, hydrogen peroxide, vinegar or baking soda are effective natural, non-toxic cleaners. However, if there is black mold, you may need to purchase a specific cleaner to disinfect the area. While these methods work for hard surfaces, keep in mind that absorbent materials with mold, such as ceiling tiles or outdoor seating cushions, should ideally be discarded and replaced.

How can you avoid mold?

Your cleaning efforts will go to waste if you don’t control the moisture in the area. To prevent mold from growing, start by identifying the source of the moisture, which could be leaks, condensation, humidity or poor ventilation. Once you know where the water is coming from, the key is to act quickly. According to the Environmental Protection Agency, you should fix plumbing leaks as soon as possible, and dry materials within a day or two of leaks or spills.

The EPA further recommends reducing the humidity levels in your home by 30 to 60 percent in order to decrease mold growth. To do so, make sure there is proper ventilation in all bathrooms, and take action by completing small steps like running the fan during and after your shower. Adding insulation to windows, doors, piping and floors can reduce condensation and improve the airflow inside your home. Dust also causes mold to grow, so make sure to clean your home regularly, focusing on baseboards, floorboards and air vents where dust is prone to build up quickly.

When should you call a professional?

When it’s ignored, mold can become excessive and cause health risks, so it’s never a bad idea to have your home inspected by a trained professional. Plus, while cleaning can be an effective temporary home mold removal solution, the mold may persist or you may experience plumbing or HVAC problems that only a professional can completely and safely repair.

Preparing for the future is the best line of defense when dealing with issues in and around your home. See how plans from Service Lines Warranties of American can help with the costs of home repairs.

8 Ways To Conserve Water At Home

Long showers feel great, but with every minute you spend pampering yourself, your wallet and the environment struggle. Along with saving money on your monthly bills, water conservation is critical for your community. According to the Environmental Protection Agency, it’s likely that at least 40 states will experience water shortages by 2024.

Follow these tips for how to save water at home:

1. Be mindful of running water.

Don’t keep the faucet running the entire time you’re brushing your teeth or washing your hands. You may have heard this one before, but it’s easy to lazily run the faucet instead of turning it off while scrubbing and then turning the tap back on when you’re ready to rinse. Similarly, avoid luxuriously long showers. Try to limit shower time to 10 to 15 minutes maximum to prevent wasting excess gallons of water.

2. Fix leaks as soon as possible.

Look out for leaky faucets, dripping water from shower heads, rusting pipes and signs of water damage.Locate the source of the leak, and fix it immediately to avoid wasting more water.

3. Don’t let the toilet run.

If you notice that your toilet is constantly running, try replacing the flapper. Simply shut off the water to the toilet, and flush to drain the tank. Unhook the old flapper from the base of the tank and chain, and then replace it with the new one. Turn the water back on, and you’re all set. If that doesn’t work, it may be time to buy a new toilet. Look for an energy-efficient model, and follow these steps to remove the old unit and install the new one.

4. Wash full loads only.

Make sure the dishwasher and washing machine are full before you run them. If you have a unit with energy-saving settings for light washes and smaller loads, take advantage of them. When it’s time to invest in a new machine, look for water-saving models with the settings that allow you to adjust to load size.

5. Use a compost bin.

An in-sink garbage disposal needs a lot of water to work efficiently, so opt for a compost bin instead. It’s healthier for the environment while reducing water waste and increasing the energy efficiency of your home.

6. Insulate pipes.

Be sure to insulate exposed pipes around the house, especially in the attic and basement. When they’re not insulated, it takes longer for water to heat up, meaning it’s running for longer periods of time. You can also cover the water heater with insulating blanket to further speed up the process.

7. Run the sprinklers in the morning.

The optimal time to water your lawn is early morning. This strategy prevents rapid evaporation from midday heat, which means less water is required to sufficiently cover the grass. Avoid rogue sprinklers wasting water by spraying the sidewalk or side of the house, instead positioning them to face the grass and landscaping appropriately.

8. Perform routine appliance maintenance.

Proper appliance care and upkeep can prevent potential leaks and wasted energy. This preventative maintenance includes regular cleaning and seeking professional advice when necessary. Plus, if it’s time for an upgrade, buy energy-saving products and appliances. According to the EPA, the average household can use about 20 percent less water with water-efficient fixtures and appliances.

Complement your water conservation at home with these ways to increase energy efficiency. With mindful changes, you can reduce your carbon footprint and save money each month.

If you notice spikes in your water bill, serious leaks or other maintenance issues during your water conservation efforts, don’t hesitate to call a professional.

See how plans from Service Lines Warranties of American can help with the costs of home repairs.

How to Fix a Screen Door

I grew up in a house with an outside deck. So I have many fond memories of sitting outside on warm, sunny days, reading and enjoying the view of my neighborhood. I would often open the sliding deck door to the adjacent living room while keeping the screen door shut so I could hear music from the living-room stereo without worrying about insects sneaking to the indoors.

So when that screen door started showing signs of wear and tear, my mom would complain how my brother and I were to blame (“too much rough housing” she would say) and “how in the world am I going to fix it?” What mom didn’t know is that while trying to patch a ripped screen door can seem difficult, it’s actually not so hard to fix.

We’ve compiled a list of common issues and helpful DIY remedies to make screen-door repairs a breeze:

Screen replacement 101

Because the screens in most screen doors consist of lightweight fiberglass, tears in the material are hardly unheard of, according to Popular Mechanics. Fortunately, they’re also easy and fairly inexpensive to replace. Your local hardware store will almost definitely have a replacement screen that fits your door. They’ll also have the specialized tool for dealing with spline – the rubber tubing that surrounds the perimeter of a screen and keeps it affixed to the door frame.

Let’s go step by step:

  1. Remove the old screen by lifting it away from the track-mounted rollers. Pull the bottom of the material out and then lower the door until the screen clears the top edge of the frame.
  2. From there, you can cut your own portion of screen material from a large roll, as HGTV noted, or purchase an a la carte pre-cut screen from your local hardware store.
  3. Next, unscrew the door’s handle, then remove the segments of spline surrounding the door frame with an awl. (Don’t get rid of your spline if it doesn’t show signs of damage, as intact spline can be reused.
  4. Use a screwdriver to remove the rollers and reattach either new or existing spline.
  5. Align the replacement screen with the frame, using the spline tool’s convex and concave rollers to press the rubber tubing into the frame grooves.
  6. Fit the screen snugly into the splined frame.
  7. Finally, trim any excess fiberglass and reattach any parts of the door (latch, rollers, panel and so on) you might’ve removed.

Learn More About Home Repair Plans Near You

Dragging wheels and other irritations

If opening your sliding screen door is a chore – it moves slowly, creaks or doesn’t close all the way – it’s time to remedy that situation. (Especially if you want to avoid insect intruders.)

The culprit behind the dragging screen is frequently worn-down or broken wheels along either the top or bottom edge of the door’s frame, according to The Family Handyman. But just like a torn screen, this problem isn’t too hard to remedy – and neither are some other issues that may be at play.

  • Make sure the wheel track is clean and unobstructed.
  • Addressing a jammed track is even easier than a wheel replacement: just clear any debris or dirt from it. If the track is bent, straighten it with a pair of pliers.
  • Check the screws holding the wheels in place – if they’re too loose or too tight, adjust as necessary.
  • Don’t forget to check the sliding screen’s top row of wheels. Because of their location, they don’t experience as much wear and tear, but better to be safe than sorry.

If these steps don’t address the issue, you probably need to change the wheels. As with replacement screens, you can easily find spare screen-door wheels at most hardware stores. To start, remove the screen door from its tracks. From there, you can unscrew the old wheels, affix your replacements to the door and put the adjusted door back in place. Ideally, it should move smoothly from then on.

Worst-case scenario

A screen door that is damaged beyond repair will need to be completely replaced. You can call your local hardware store, handyman, or big box retailer to find a new screen door that works for you.

Being prepared for home repairs before they arise is always a good strategy. See how plans from Service Lines of America can help with the costs of covered repairs.

Ever Wonder What A Dishwasher Air Gap Is?

I’ll admit it, I never thought about the inner workings of my dishwasher until it started giving me issues, and I had to figure out why the dishes weren’t coming out clean. When someone asked me if I’d checked the “dishwasher air gap”, I had no idea what they were talking about. So, that prompted me to Google how dishwashers work. (I’m somewhat of a self-proclaimed expert now.)

What I learned is: Your dishwasher is connected to the same plumbing infrastructure as the rest of your kitchen, meaning it’s eerily close to the dirty drain water that flows down your sink. If there’s a clog in your drains, that dirty water could flow back up into your dishwasher, contaminating your kitchen’s sanitation haven. Lucky for you, the dishwasher air gap is there to prevent such an unfortunate event from plaguing your appliance.

So what is a dishwasher air gap anyway?

Usually fitted to an existing hole on the sink or countertop and covered with a decorative cap, a dishwasher air gap connects to hoses below the sink or countertop. One is the dishwasher drain hose and the other typically connects to the sink’s drain pipe or garbage disposal.

As the unit runs, the dishwasher pump pushes wastewater to the air gap so it can exit through the drain hoses. If there is a backup or build up in pressure, the air gap also pushes fresh air into the hoses to prevent dirty water to flow back into the dishwasher. The process is essential for preventing cross-contamination between pipes and backflow into the dishwasher.

Does your dishwasher have an air gap?

I know, after all this talk about dirty sink water, why wouldn’t you want to have a dishwasher air gap? Well, some building codes only require minimal ventilation systems, so if you can’t find an air gap in your kitchen, odds are your area doesn’t consider it a compulsory component. However, if you’re planning on installing a new dishwasher any time soon, be sure to check local building and plumbing codes to determine if you should be including an air gap.

Do you need to do anything with the air gap?

Your dishwasher air gap will generally get on with its business with little necessary maintenance. However, cleaning it regularly can prevent blockage issues. To do so, simply remove the cover and unscrew the plastic cap. DoItYourself.com recommended removing the air gap entirely so you can flush it with water and wipe away debris. While you have visibility to the hoses, check it for clogs. If you see any signs of trouble, you can remove them to rinse and dry. Once you get everything back in place, be sure to check for leaks during the next dishwasher cycle.

If you want to install an air gap for your existing dishwasher, you can purchase a kit and follow this step-by-step guide from SFGate Home Guides. Alternatively, a licensed plumber can easily handle the project.

Maintaining the air gap goes hand in hand with overall dishwasher upkeep. For instance, loading your dishwasher correctly and cutting down on excessive water use can boost the appliance’s efficiency. And while it may feel a tad counterintuitive, you should clean your entire dishwasher about once a month.

Being prepared for home repairs is always a good strategy. See how plans from Service Line Warranties of America can help with the costs of water sewer line repairs and replacements.

Here’s How to Fix a Leaky Faucet

Here’s How to Fix a Leaky Faucet

running faucet

Plink. Plink. Plink. The sound of a dripping faucet — whether it’s in the kitchen or the bathroom — is enough to keep you awake all night. Aside from the constant dripping, there’s the worry that you’re wasting incredible amounts of water. And for good reason: According to the Environmental Protection Agency, a leaky faucet that drips one drop per second will waste more than 3,000 gallons of water per year!

This May Also Interest You: How (And Why) to Clean Your Faucet Aerators

Needless to say, when you hear that dripping sound, you’ll want to act as soon as possible. Luckily, fixing a leaky faucet is a relatively simple task.

First Things First: Compression or Washerless?

The two basic types of faucets in homes are compression faucets and cartridge (washerless) faucets. These two faucets use different components to control the water, so the process of repairing them is slightly different.

compression faucet uses a rubber washer that keeps the valve seat in place. Over time, water pressure forces the washer against the valve seat, creating constant friction that will eventually cause it to wear out.

On the other hand, a washerless faucet uses a cartridge or a ball instead of a rubber washer and a valve seat to control the faucet’s water flow. While they typically last longer than compression faucets, they can also crack or become worn-out through normal wear and tear.

Turn Off Your Water

No matter what type of faucet you have, you should begin each faucet repair project by shutting off the water at the supply valves under the sink. Turn both valves clockwise to shut the water off. After you’ve done this, make sure you open up the faucet to release any excess water and pressure still left in the line. You’ll also want to close the drain, just in case any small but essential pieces drop into the sink.

How to Fix a Washerless Faucet

Remove the Faucet Handle

Once the water has been shut off, start by removing the faucet handle. To do this, find the small set screw located somewhere near the bottom or back of the handle. Every brand is different, but these screws are often hex screws, so you might need the correct size Allen key to unscrew it. When the set screw has been unscrewed, lift the handle up and remove it.

Depending on what type of washerless faucet you have, the internal components of the handle may look a little different.

If You Have a Cartridge Faucet

You’ll need to remove the retaining nut before pulling out the cartridge. Using a pair of adjustable pliers, gently turn the nut counter-clockwise to loosen it. Then, loosen the rest by hand. When the nut has been removed, use needle nose pliers to pull out the cartridge. To repair the leak, simply replace the cartridge with a model of the same size.

If You Have a Ball Faucet

A leak is usually caused by worn-out valve seats and springs. To replace them, use a pair of adjustable pliers to remove the handle cap. It’s possible that the cap will feel stuck in the housing. Again, don’t apply too much pressure with your wrench. Instead, wrap a cloth soaked in white vinegar on the dome and let it sit for a few minutes before trying again. Once the cap has been removed, remove the plastic cam, cam washer, rubber packing washer and the ball valve assembly as well. When the ball is out, the valve seat and springs should be visible. Remove them and replace them with new ones.

More Related Articles:

How to Fix a Compression Faucet

Remove the Faucet Handles

To fix a dripping compression faucet, you’ll need to access the internal parts of the faucet. Start by taking off the faucet’s handles by removing the set screws located near the bottom or back of the handles. Then, use a screwdriver to loosen the screws holding the handle in place.

Remove the Stem

When the handles have been removed, locate the internal stem and stem nut that holds it in place. Using a wrench, carefully loosen and remove the nut.

Examine the O-Ring

Next, pull out the stem. Now, you should be able to see the O-ring and seat washer. Take a moment here to examine the O-ring. If it looks worn or cracked, replace the O-ring while you have the sink disassembled.

Replace the Washer

At the bottom of the stem, you’ll find the seat washer. Sometimes, the seat washer is held in place by a screw. If so, remove it before attempting to remove the washer. Once the washer is out, simply replace it with a new one. Luckily, these parts are inexpensive. Just make sure that you replace the O-ring and washer with ones that are the same size, as even the slightest difference can cause a big leak.

Once the washer has been replaced, reassemble the faucet and give it a test run to make sure you are leak-free.

Know Your Faucet

Knowing what type of faucet you have will help you diagnose and repair a leak any time one might occur. And while it might take some time and patience, repairing a leaking faucet is a project anyone can do without having to call in the pros.

Pipe Down! What to Do About Noisy Water Pipes

Pipe Down! What to Do About Noisy Water Pipes

You expect to hear a rush of water when you turn on your washing machine or flush your toilet. What you don’t expect is a banging, clanging or gurgling sound coming from your water pipes.

This May Also Interest You: Pipe Burst? Here’s What to Do Next

Here’s what’s causing the wretched noise — and how to fix it.

Why Are My Water Pipes…

Your plumbing system is an intricate maze of pipes, drains and valves, all of which work together to give you the comforts of modern plumbing on demand. When something goes wrong, you typically find out quickly with signs like leaks, low water pressure or noisy pipes. Often, the type of noise you’re hearing indicates what’s wrong with your plumbing.

Banging

Does it sound like someone’s hitting your pipes with a hammer every time you run water? The issue could be a phenomenon called water hammer, which happens when a water valve closes suddenly. You’ll often hear it when your washing machine stops filling, for example. The momentum and pressure from the water flowing toward the valve create the shockwave that causes the banging noise when the valve closes suddenly. It might not seem like a big deal, but water hammer can cause damage to your pipes, including leaks and joint damage.

One way to ease water hammer is by installing water hammer arrestors. Your plumber can install them near major valves to help cushion the shock of the water when it suddenly stops or changes direction. You might also need to reduce the water pressure coming into your home with the pressure-reducing valve.

Gurgling

Gurgling sounds typically come from drainpipes. This sound happens when the water can’t drain properly, usually when there’s a clog in the water pipes. Drain clogs often happen due to hair, grease, soap scum or objects that fall down the drain. They can happen suddenly or build up slowly over time.

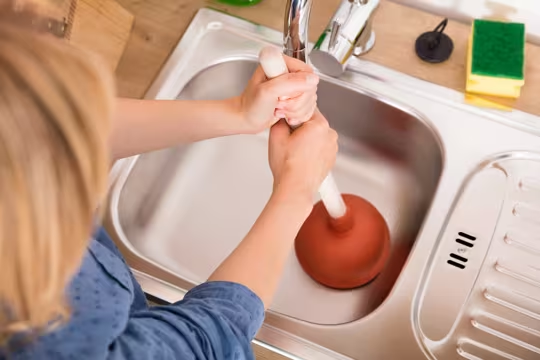
You can sometimes clear a clogged drainpipe with a plunger to help force the clog through the pipe. A plumbing snake or an auger can also help break up tough clogs. A common plumbing myth is that chemical drain cleaners are safe and effective, but they often don’t work and contain harsh chemicals that can hurt you and your plumbing. If you can’t remove the clog with a plunger or snake, it’s best to call a plumber to help.

More Related Articles:

Rattling

Water travels through your pipes with lots of pressure, so the pipes are bound to move a little. Pipes should be secured well to keep them from moving too much when water runs through them. If they’re not properly fastened or the fasteners come loose, you might hear them rattling when you run water.

Resecuring the pipes can cut down on the rattling noise and prevent damage to the joints of the water pipes. However, many pipes run behind walls where you can’t easily access them. A plumber can help determine if loose fasteners are the cause of the rattling and resecure them if necessary.

Humming

If your pipes sound like they’re humming, it’s likely a water pressure issue. When the water pressure is high, it can cause the water pipes to vibrate and create a humming sound. High water pressure is more common if you have a well for your water, but it can happen with municipal water as well. High water pressure can damage your plumbing and cause leaks.

If you have a well, check the pressure to ensure it’s below 55 pounds per square inch. A plumber can test the pressure for you and help adjust the issue if you’re not sure how to do it yourself. If you’re connected to the municipal water source, your home likely has a pressure-reducing valve near where the water enters your home. You can adjust the screw in the valve to decrease the pressure, but be careful not to lower it too much.

Squeaking

Squeaking or squealing is another common sound you’ll hear in your water pipes. This often happens if small components within the plumbing, such as washers or aerators, become loose, dirty or damaged. When this is the cause, the squeaking sound is usually confined to a certain fixture or area of plumbing. Replaced or repairing the part should solve the noise.

If you can hear the squealing sound everywhere in your home, it could be an issue with water pressure. Buildup in the pipes narrows the space for the water, which can cause squealing as the water tries to squeeze through the pipes. Wear and tear on the plumbing system can also cause whistling or squeaking. These situations typically require a professional plumber to diagnose and repair.

5 Tell-Tale Signs Your Water Heater Isn’t Doing So Hot

5 Tell-Tale Signs Your Water Heater Isn’t Doing So Hot

You might not give much thought to your water heater, but, like most things, water heaters get a lot more attention when they stop working properly. How can you tell if your water heater is having issues — even before something goes wrong?

This May Also Interest You: What’s the Difference Between Tank and Tankless Water Heaters?

Beyond the obvious (your hot water isn’t working), there are actually quite a few signs your water heater is going out. Learn what these symptoms might mean for the health of your machine.

Broken Water Heater? Check For These 5 Common Problems:

Inconsistent Water Temperature

One way to know that your water heater is not working as it should is if you’re experiencing inconsistent water temperatures. Inconsistent water temperature could signal an issue with the thermostat, but it could also point toward a problem with the heating element, which is a bigger issue to address. However, if your water is not staying heated for long enough, it may mean that nothing is actually broken; you just need a bigger tank. If inconsistent heating continues to be an issue with your water heater, have a licensed plumber come out to inspect the situation further.

Low Water Pressure

Low water pressure is another possible warning sign that your water heater is acting up. Although other factors can influence water pressure, if you notice the water pressure from your taps is lower than usual when the warm or hot water is running, the issue is likely with buildup in your water heater. Sediment collects inside the water heater over time, causing blockages and lower flow. To fix this issue, you could call in a plumber to either clean the supply lines or replace the pipe. If you have a newer model water heater, you might want a plumber to try cleaning and flushing the sediment from the pipes first to see if that fixes the problem.

Discolored Water

If your water starts to look murky or rusty, it may be a warning sign that your water heater is corroding. If a water heater tank begins to corrode, rust can build up pretty quickly, causing discolored water that doesn’t taste good. Although it’s likely not harmful, this rust can damage your appliances. Plus, no one wants rusty, murky water to shower or wash dishes with!

Before replacing the entire water heater, you can try replacing the anode rod and see if that solves the problem. Anode rods are steel wires that have other components — like magnesium and aluminum — that help prevent corrosion in standard tank water heaters. However, they typically wear out faster than the water heaters themselves, meaning you’ll probably need to replace your anode rod every three to five years, depending on your water quality and usage.

More Related Articles:

Strange Noises

Water heaters make some noise as part of their regular functioning, but if you start hearing unusual sounds coming from your water heater, it may signal that your water heater needs some work. If you hear a rumbling or banging sound, you could have sediment buildup in your tank that needs to be flushed out. Excess sediment buildup can also cause a popping sound. In addition to flushing out your tank, replacing your anode rod might be in order.

A crackling or hissing sound, on the other hand, may indicate moisture buildup in a gas water heater. In an electric tank, it may mean something is obstructing the tank’s heating element. If this is the case, you may need to drain your tank or call a professional for further assistance.

Whistling or high-pitched screeching sounds (yikes!) are usually related to pressure adjustments in your tank. If they continue, you may want to double-check that your pressure valves and your temperature valves are adjusted properly. If you aren’t comfortable addressing this on your own, you can call in a technician to come take a look.

Eggy Smell

An eggy smell in your water is no fun, and it’s often a sign that your water heater is not working properly. Although other water issues, like sulfur bacteria in your water supply, can also cause your water to smell like eggs, if the issue is specific to your warm and hot water supply, then you can assume the problem stems from your water heater. Sulfur bacteria love the warm, wet conditions of a water heater tank. The bacteria can build up in your tank, causing that unpleasant rotten egg smell.

Although it doesn’t mean that your water heater is broken, an eggy smell is something you’ll want to remedy ASAP. To kill the sulfur bacteria, some people suggest shocking the tank with bleach. This can be a little tricky to do, so you may want to try raising the temperature of your tank temporarily instead to kill the bacteria. You can also try replacing your magnesium anode with one of a different material. Aluminum rods tend to produce less sulfide bacteria than magnesium rods, which might be helpful if your water is prone to developing that sulfur smell.

Broken Water Heater No More

If your water heater is exhibiting any of the warning signs above, it’s best to address them promptly to avoid bigger problems down the line. The good news is that many of these issues can be fixed without having to replace your water heater entirely, meaning you can get back to enjoying dependably hot showers again without breaking the bank.

How to Thaw Frozen Pipes

How to Thaw Frozen Pipes

One of the best times to be indoors is when the temperatures plummet. Nothing quite beats the feeling of being snuggled under a blanket in the protective warmth of your house when a winter freeze hits. But that feeling of comfort can quickly evaporate if one or more of the pipes in your plumbing system freeze.

This May Also Interest You: Pipe Burst? Here’s What to Do Next

If that happens, not only will you experience an inability to access the water supplied by the pipe, but you may also be faced with a burst pipe, which can lead to thousands of dollars in damage if not handled correctly. Fortunately, thawing out frozen pipes is an easy procedure — as is keeping them from freezing in the first place. Here’s what you need to know.

What Causes Pipes to Burst in the Winter?

While practically any pipe in your home can freeze if it gets cold enough, the pipes that run through exterior walls or through unheated areas like basements or crawlspaces are especially prone. When the water that flows through these pipes freezes, it expands. But that’s not the direct cause of the bursting pipe. The ice forms a blockage in the pipe, which causes a buildup of pressure between the blockage and your faucet. This increased pressure is what can eventually cause a pipe to split open.

What Are the Signs of Frozen Pipes?

The clearest sign that one or more of your plumbing lines is frozen is when no water (or just a little trickle) comes out of the faucet when you turn it on. Another sign that signals ice in the lines is a clanging or gurgling sound when the water is used. The pipes themselves can also give you a heads-up that something might be wrong. Pipes that look swollen or those covered in condensation could be an indication that they are succumbing to the pressure buildup caused by ice.

How Can You Thaw Frozen Pipes?

If you notice any of these signs, your first step should be to shut off the water at the main valve. This is usually found on the inside of the house where the main water line enters from the street or your well. Then, trace the line from the faucet that’s not working to find the source of the ice blockage. If you are having issues at more than one faucet, the issue might be somewhere along the main line or in multiple places.

After you find the problem spot (or spots), your goal is to get the pipe warmed back up. The methods to do this aren’t very fancy, but they do work. You can simply run a hairdryer back and forth along the line to defrost the pipe. Similarly, you can wrap the frozen area in an electric heating pad. A portable heater placed near the frozen pipe can also get the job done, as can special heating cables wrapped around it. Finally, for the most low-tech of all solutions, if you can access hot water anywhere in the home, you can soak bath towels in hot water, then wrap them around the frozen pipes.

When thawing pipes, you’ll want to be sure that you have some buckets and extra towels around. If the pressure buildup has already created a small tear or hole in a pipe, when you turn the water back on, it can spray everywhere and accumulate quickly.

Also, never use any kind of flame or device that uses a flame to defrost your pipes. This is not only a safety hazard, but it can damage your pipes even more.

More Related Articles:

How to Prevent Frozen Pipes

Pipes generally need to be in 20-degree Fahrenheit (7-degree Celsius) weather for more than six hours to begin to freeze. So knowing this, you can take steps to keep things warm. One option is to place a space heater in any areas where it can get exceptionally cold in the winter months, like your basement or garage. In the home, keep cabinet doors open so that your home’s heat can reach the pipes, especially if they are on exterior walls.

And speaking of your home’s heat, when it gets exceptionally cold outside, it’s a good idea to keep your thermostat at a set temperature. While some people use timers or smart thermostats to save energy, a deep freeze is not the time to skimp on heat. The damage from a burst pipe can cost a lot more than a little extra warmth. If you are going away during the cold months, leave your thermostat on a setting not lower than 55 degrees Fahrenheit (13 degrees Celsius).

In addition to providing heat to your pipes, you can also insulate cold areas in your home and wrap the pipes themselves with inexpensive pipe insulation.

Although it might sound like an old wives’ tale, leaving water trickling out of your faucets really can help ward off frozen pipes as moving water is much less likely to freeze than still water. Again, it might go against your sense of environmentalism to waste water, but a burst pipe can dump gallons in mere seconds and cause damage that would require hundreds or even thousands of dollars in new materials to repair.

Got a Clogged Sewer Line? Here’s What to Do

Got a Clogged Sewer Line? Here’s What to Do

When you have a clogged drain in your house, your first instinct is probably to grab a plunger. Little do you know, there are some cases where standard plunging is almost useless — like when the main sewer line in your home gets clogged. When this happens, you can end up with widespread flooding and plumbing problems all over your home.

Plumbing eLocal Banner 1

This May Also Interest You: Water Sewer Line Repair: DIY or Plumbing Pro

To prevent serious damage, you need to be able to identify clogged sewer lines and know how to handle them.

Are Your Main Sewer Lines Clogged?

Throughout your home, you have drain lines carrying wastewater away from sinks, toilets, tubs and more. All of these lines lead to the main sewer line. This huge pipe sends all the waste from your home right to your sewer or septic system. When it gets clogged, drains all over your home are unable to work — and you could even end up with water backing up out of your fixtures, leaky pipes and other problems. Yikes!

If you find yourself with a main sewer line clog, there’s not really any do-it-yourself way of fixing it. These drain lines are often buried deep under the ground far away from your home. You typically need special equipment and professional know-how to handle them. Though you usually cannot repair it yourself, that doesn’t mean you’re helpless. There are still a couple things you can do to keep the problem from getting worse until a plumber can help you.

clogged sewer line

Clogged Sewer Line Causes

This type of clog is fairly rare, since most sewer lines are around 4 to 6 inches wide. It usually only happens if something has gone seriously wrong in your plumbing system. One of the most common causes of a clog is damage to the sewer line itself. If a pipe collapses or bends, the damage can keep waste from moving through the line properly. There are all sorts of things that can harm a sewer line, including:

Plumbing eLocal Banner 2
  • Shifting soil around the pipe
  • Corrosion within the pipe
  • Construction near the line
  • Heavy traffic above the sewer pipe
  • Damaged pipe joints

Another big reason sewer lines clog is that they gradually sag over time. This bend in the pipe makes it easy for debris to collect, eventually causing a clog.

water service line

The most common type of debris that clogs a sewer line is fat. If you pour greases, fats or oils down a sink drain, they will eventually cool and harden. Even if you run hot water with the grease, it typically firms up by the time it reaches your main sewer line. Then, the fat sticks to your lines and causes a clog.

Other types of debris that often causes clogs includes paper towels, so-called flushable wipes, sanitary products and other bulky items flushed down the toilet. You should never send anything besides liquids and toilet paper down your drains.

Plumbing eLocal Banner 2

A final cause of clogged sewer pipes is tree roots. Trees are surprisingly powerful. Even tiny roots can worm their way into your pipes over time. You may not notice a significant leak since the root will clog up the broken area in the line. However, as the roots keep growing inside of the pipe, they form a mass through which sewage has a hard time passing.

Signs Your Sewer Line May Be Clogged

Most clogged sewers happen gradually. Being able to identify them in the early stages will help you address problems before you end up with sewage water flooding your entire house. Here are some things to look out for if you suspect that you may need a sewer line cleaning:

Dark Water

One of the signature symptoms of a main-drain clog is water backing up in your tubs or showers. This happens when you try to drain water but there’s nowhere for it to go because the sewer line is clogged. The water then moves backward, seeking the lowest point of entry. In most homes, this will be the shower, tub or floor drain in a basement.

Unlike flooding fixtures caused by a leaky pipe, the water will not be clear. Since a lot of waste material is mixed in, it will usually be dark, stinky and gross-looking. Keep in mind that this water can have raw sewage, so you need to be cautious around it. Use proper protective gear and powerful cleaners when cleaning up after dark water flows into your drains.

Slow-Moving Drains

Take a minute to think about the drains in your home. Are they draining rapidly, or do you notice water pooling whenever you run the water? Your drains tend to slow down when there’s a clog because most sewer line clogs do not suddenly block 100% of the pipe. Instead, debris accumulates over time, making it harder and harder for waste to move through.

If all the drains in your home are starting to slow down, the problem is most likely a clogged sewer line. Typically, the first drains you will notice slowing down are the toilet drains. When you flush the toilet, the water may seem to hang there for a moment before gradually sinking down. Toilets are often the first drain affected by a mainline clog because they’re usually connected directly to your sewer line.

Gurgling Sounds

Because a mainline clog keeps your drains from working properly, you might get some weird reactions as you use your plumbing system. When you run a sink, flush a toilet or use a washing machine, water and air bubbles can form. All this stuff rumbling around in your pipes can cause noises. Since sound travels strangely through pipes, these noises can seem to come from plumbing fixtures, walls other rooms, or even the floor and ceiling.

The most frequent sound people report is a gurgling noise that happens while they’re using a drain. However, you may also notice strange hissing, bubbling or trickling noises. If your main sewer line is almost entirely clogged, it can take a while for stuff to drain through. Therefore, you may keep hearing weird noises long after you quit using a drain.

Clogged Plumbing Fixtures

If your clogged sewer line goes unnoticed for too long, you’ll start noticing this sign: As the clog builds up, almost no wastewater will be able to move through the pipe. When this happens, your drains quit working altogether. Instead of just slightly slow drainage, your plumbing fixtures will seem to quit draining entirely.

Remember that all the plumbing fixtures in your home are connected, so a clogged sewer pipe will keep draining from happening all over the house. If you run the kitchen sink, you may walk into the bathroom to find a shower that seems clogged. Your toilets on the upper floor might seem to work fine, but then when you go downstairs, all the sinks may be clogged.

What to Do When Your Sewer Line Is Clogged

Noticing that your sewer line is clogged is half the battle. Once you realize it’s happening, the solution is simple. You just need to keep calm and follow these two simple steps:

1. Turn Off the Water

First of all, turn off the water in your home. This step is important because it keeps the situation from getting worse. You don’t want to absentmindedly turn on a clogged sink and end up flooding one of your bathrooms with raw sewage. It also keeps leaking pipes or automatic processes — like a dishwasher on a timer — from trying to drain more water into your clogged line.

To turn off your water, you need to identify your water main, which is the line that supplies your home with water. Often, you can find it near your home’s water meter, or sometimes it’s outside the home near a corner of your house. It typically has a large wheel, handle or lever. Turn it until it’s entirely closed off.

2. Call a Plumber

It’s technically possible to clear out some small sewer line clogs yourself, but this is rarely advisable. The problem with DIY repair is that the majority of sewer line clogs are caused by broken pipes, tree roots and other issues deep within your plumbing system. Most people who know how to handle a basic drain clog don’t have the tools for sewer drain clogs.

Professionals have heavy-duty main sewer line cleaners and other equipment that lets them clear away all sorts of clogs. They also have the knowledge and experience to diagnose the primary issue. Just dumping some main drain cleaner down a toilet yourself won’t help you identify and repair tree root growth or other serious plumbing problems.

Getting a professional to examine your whole plumbing system will help ensure the real problem is addressed. Depending on your situation, you may need to replace sewer pipes entirely, which can involve digging up the yard and doing some major plumbing.

How Do You Unclog a Sewer Line?

Ultimately, you do need a professional who knows how to unclog a sewer line. However, there are a few things you can do to at least try mitigating the clog before your contractor arrives.

Many homes have a sewer line cleanout, which is a large pipe with a cap on the end, found in your basement or on the side of your home. You can remove this cap to access your main sewer line. If you get very lucky, the clog might have been forced against your cleanout, in which case, you can just pull it out manually.

You can also try running a plumbing auger through the sewer line. This may break up the clog or enable you to pull out some of the debris. However, sewer line clogs are often big enough that the standard drain auger can’t fix the clog.

Most of the time, snaking your sewer line yourself will just get things moving a little, making it easier to clean up backflow and get your home in livable condition. Keep in mind that clogs will probably keep happening until you get a thorough sewer line cleaning. You’ll still need to call in a licensed plumber to handle the main clog.

When you have coverage from Service Line Warranties of America, even big plumbing problems don’t have to be a hassle. We help cover the cost of repairs up to your benefit amount, so your finances are protected from unexpected issues. With our 24/7 repair hotline, you can always speak to someone about scheduling a visit from a plumber. Get access to these benefits and more by signing up for a plumbing plan from Service Line Warranties of America today.

How to Get Water Out of Your Washer

How to Get Water Out of Your Washer

A washing machine is a true workhorse appliance, and if it quits on you unexpectedly, it can wreak havoc on your laundry routine. To make matters worse, sometimes a washer will stop working mid-cycle, leaving you with gallons of standing water to deal with. So, what’s the easiest way to get water out of your washer without making a royal mess?

This May Also Interest You: Why Is My Washing Machine Leaking?

The truth is, there are a couple of different approaches to removing water from the washing drum when your washer won’t drain. Which one will work best for you will depend on the issue and the type of machine you have. Here’s a list of do-it-yourself strategies you can use to try and remove the water from your machine and ready it for whatever repair might be necessary.

4 Ways to Get Standing Water Out of Your Washer

Check the Lid

As with most troubleshooting, it can pay to start with the simplest possible solution. First, double-check that the washer’s lid (or door for front-loading machines) is completely closed, since this can sometimes prevent washers from completing a cycle. Many washers have a lid switch that must be in the locked position in order to run. If your washer has one of these, make sure the lid is clicking into place properly so that it’s engaging the switch. If you aren’t sure it’s working, you can try to press the lid switch manually and listen for that tell-tale clicking noise. If you don’t hear it shift into place, this could be your problem.

Try the Spin Cycle

If the lid’s not the issue, see if you can turn your machine to the spin cycle manually and try to drain the water that way. You can also go for the old “turn it off and on again” technique here by unplugging it and plugging it back in. It could be that your machine just had a weird mechanical blip that wasn’t allowing it to drain properly, and resetting it may solve the problem.

Drain the Drain Hose

If the spin cycle technique didn’t work, you can try draining the drain hose instead. Important note: You’ll want to make sure to turn off both the power and water supply before attempting this to prevent electric shock or flooding. Even so, you should plan on water leakage, so go ahead and put some old towels down to protect your floor.

For Top-Loading Machines

You’ll need to pull the washing machine away from the wall to reach the drain hose in the back. The drain hose connects your washer to a drain pipe in the wall and is typically gray. Before removing it, just double-check that it’s not kinked or twisted in a way that may be preventing your washer from draining properly.

If that doesn’t seem to be the problem, you can go ahead and disconnect the drain hose from the wall, holding it upright so the water doesn’t run out until you are ready to let the water from your machine drain into a bucket or other container.

While you have the hose disconnected from the wall, go ahead and check to see if there’s any debris stuck in the pipe. If your washer’s drain hose is clogged, that could be to blame for your drainage problem.

More Related Articles:

For Front-Loading Machines

You’ll need to remove the access panel on the bottom front of the washer to access the drain line. Some front-load washing machines come with a single drainpipe filter, but some have both a drainpipe filter and a drain hose. For machines with only a drain pump filter, you can put a shallow container (like a plastic bin or old cake pan) under the filter to catch the water, turning the knob slowly so the water doesn’t pour out too quickly. You can dump the water as the container fills up and repeat until you’ve drained all the water.

If you have both a drainpipe filter and a pipe, you’ll need to unclip the drain tube, remove the end cap, and let the water drain from the pipe that way. While you’re here, you can go ahead and inspect the drainpipe filter for debris and scrub clean if necessary.

Manual Draining

If you try the above steps, but the water still doesn’t want to drain from your drain pipe, you likely still have a clog that you can’t locate. In this scenario, you may have to manually remove the water by scoping it directly out of the drum. This will require a container for scooping and a lot of towels to help with inevitable spillage and for sopping up the last bit of water in the drum. It’s not the most glamorous of tasks, but you’ll be glad to have all that standing water out of your washer until you can troubleshoot further.

Down the Drain

A washer not draining is a real downer, but sometimes the issue isn’t as serious as it seems. That said, appliances don’t always cooperate, and if you run into problems with any of the above approaches, you may have to call in a service professional to help get the job done.

Iced Out? Why Your Fridge Is Freezing Over

Iced Out? Why Your Fridge Is Freezing Over

Have you ever opened your fridge and wondered why the back wall is covered in a sheen of moisture? That’s condensation, which is completely normal and generally harmless. What’s not normal in most modern refrigerators is ice buildup outside of the freezer unit. If you have a huge chunk of ice forming on the wall of your fridge, you’re going to want to take immediate steps to remove it.

This May Also Interest You: Common Refrigerator Problems and How to Fix Them

Read on to find out more about ice buildup in the fridge and how to address it.

Why Is There Ice Buildup in My Fridge?

There’s always going to be a chance that moisture will collect on the inner walls of your fridge, especially toward the back. That’s because cold air holds less moisture than warm air. The colder the air is, the more moisture is pulled out of it. That moisture then settles on the surfaces of your fridge. The air inside your fridge tends to be coldest toward the back, which is why moisture often forms there first.

If you see ice starting to form on the inside of the fridge, though, that’s an indicator that something might be wrong. The normal moisture is starting to freeze, which can lead to temperature control problems inside the unit. It can also lead to the failure of the appliance.

How to Manually Defrost a Fridge

Ice can form for a variety of reasons. Sometimes, these are one-off or temporary causes, like climate issues or the way you’ve filled the fridge. Ice may build up if you’ve been opening and closing the door more than normal. If you see ice building up, you may want to defrost the fridge, then keep an eye on it to see if the issue arises again. The recurrence of ice would indicate a more serious problem.

Not all appliances are the same, so remember to consult your manufacturer’s instructions for more specific steps on what to do if your unit has ice buildup. Here are the basic steps for manually defrosting your fridge:

1. Take everything out of the fridge and freezer, then transfer it to another unit. If you don’t have another unit, consider “eating down” what’s in the fridge without replacing it so you can defrost the unit without wasting as much.

2. Unplug the unit.

3. Open the fridge and freezer doors to allow warm air inside.

4. Put drip pans or towels under the front of the fridge to catch the water that will eventually run out.

5. Let the unit defrost completely (this can take a full 24 hours), then dry interior areas with a clean towel.

6. Plug the unit back in and make sure everything’s working well. Watch for ice buildup as your fridge returns to normal temperatures.

7. Fill it back up with groceries once the temperature is cold enough, and ensure you keep the doors closed as much as possible.

Pro Tip: If you’re already going through all this work to clear out your fridge, make use of this time to deep clean the refrigerator. That way, when you get it back up and running, you have a fresh and sparkling interior, too.

More Related Articles:

Tips for Reducing Ice Buildup in Fridge

You won’t want to have to go through the manual defrosting process too often. Here are some things you can do whether you have a full-size unit or a minifridge with ice buildup:

  • Keep the doors closed as much as possible. You let warm, moist air into the fridge every time you open the door. This can increase condensation and may make your fridge work harder.
  • Ensure your fridge is level so the doors stay closed.
  • Check the hinges and gaskets. Order replacement parts if necessary to ensure the doors can shut firmly and stay sealed.
  • Let hot dishes cool before you store them to reduce moisture in the fridge.
  • Store water-heavy foods such as fruits and vegetables in the humidity-controlled crisper to reduce the moisture in the main area.
  • Check to ensure the fridge thermostat is set correctly. The FDA recommends an internal temperature of 40 degrees or lower, but you don’t want to go so low that foods and drinks freeze inside the fridge.
  • Adjust internal fridge temperatures according to ambient temperatures outside. If the temperature of the room is warm, you may need to turn down the thermostat in the fridge to keep it cool enough for food safety. But if it’s very cold in the room outside, you might need to turn the internal fridge temperature up a bit to keep ice from forming inside. Smart fridges can often handle this adjustment for you.

Signs You May Need Help From a Professional

Water and even ice inside your fridge don’t necessarily indicate a serious problem; you may just need to perform some routine DIY maintenance. Make sure everyone in your household is also following good fridge practices as outlined above.

However, there are times that ice buildup can indicate a bigger issue. Perhaps the appliance itself is in need of professional repair. In other cases, you may need an electrician to ensure power is flowing appropriately in your kitchen. If ice buildup is a recurring issue, you should call a repair technician.

Since we’re all home now more than ever, being prepared for unexpected home repairs with a plan from Service Line Warranties of America is important. Having a plan in place gives you peace of mind knowing that you can simply call our 24/7 repair hotline for covered breakdowns. See what plans are available in your neighborhood.

How Much Does a Septic Tank System Cost?

How Much Does a Septic Tank System Cost?

Septic Tank Installation and Repair Costs at a Glance

  • Average total cost: $4,500-$9,000 (CAD 5,800-CAD 11,600)
  • Septic tank cost: $1,500-20,000 (CAD 1,900- CAD 25,800)
  • Labor cost: $1,500-$4,000 (CAD 1,900-CAD 5,100)
  • Drain field replacement: $1,000-$5,000 (CAD 1,300-CAD 6,500)

The wastewater your household creates is full of dangerous bacteria. Having a fully functioning septic tank is essential to help dispose of it safely — and to keep it from backing up into your sinks and toilets.

This May Also Interest You: What’s the Difference Between Septic and Sewer?

Read on for everything you’ll need to know about septic tank replacement, including how much it costs.

What Is a Septic Tank?

A septic tank is an underground chamber that moderately treats domestic wastewater. It’s designed to hold the wastewater long enough for solids to settle at the bottom and oil and grease to float. Liquid waste is then filtered out.

How Much Does It Cost to Install a Septic Tank?

On average, the cost of installing a new septic tank system is $6,100 (CAD 7,900), based on data from Fixr. The price ranges from $4,500 to $9,000 (CAD 5,800 to CAD 11,600) for a typical 1,000-gallon tank, which is an ideal size for a three-bedroom home.

This cost is inclusive of the tank itself, which costs around $1,500 (CAD 1,900) for a basic gravity tank and as much as $20,000 (CAD 25,800) for an aerobic system.

According to Bob Vila, labor costs are also included in the installation price, and usually range from $1,500 to $4,000 (CAD 1,900 to CAD 5,100).

Types of Septic Tank Systems

The total cost of installing or replacing your septic tank is largely dependent on the type of system you choose. Here are some of the most common kinds of tanks:

Anaerobic Septic System

Anaerobic systems are a common choice for many homeowners because they don’t require additional power or chemicals. An anaerobic system contains bacteria that do not need oxygen to survive. The bacteria break down solid waste, and the remaining liquid waste is piped out and distributed under the soil. The waste is naturally recycled as the water passes into the soil.

These systems cost about $2,000 to $5,000 (CAD 2,600 to CAD 6,400) to install.

Aerobic Septic System

Unlike anaerobic systems, aerobic systems use bacteria that do require oxygen to survive. Oxygen is pumped into the tank to activate the bacteria, which then feed on solid waste. Aerobic systems work well where the soil isn’t favorable for other systems and the groundwater table is high. It’s a good option for homes located near a body of water.

Aerobic systems are more expensive to install. Fixr says you should expect to pay between $10,000 and $20,000 (CAD 13,000 and CAD 25,800).

Gravity Septic System

A gravity septic system uses gravity for filtration and water flow. They need to be installed on a gentle slope to enable water flow without a pump.

Installation costs $1,500 to $4,000 (CAD 1,900 to CAD 5,100).

Conventional Septic System

The conventional septic system consists of a septic tank and a trench that acts as a drain field. The trench is constructed on stone or gravel and allows water to pass through. To prevent sand or dirt from contaminating the clean soil, geofabric is installed on top of the trench. A conventional septic system needs a large space to operate.

These systems cost between $2,000 and $7,000 (CAD 2,600 and CAD 9,100) to install, according to This Old House.

Mound Septic System

If your groundwater is close to the surface, a mound septic system is the best choice. A sand mound is constructed on the septic system area to pump wastewater from the tank into the mound in small quantities. The sand then filters the water before it gets into the soil and groundwater. This design requires a lot of space.

They’re also expensive to install because a sand mound has to be constructed. Total cost ranges from $10,000 to $20,000 (CAD 13,000 and CAD 25,800).

Chamber Septic System

Chamber septic systems have recently become a popular choice. They’re similar to conventional systems, except plastic chambers are used in the drain field instead of gravel. These are easier to construct and have a smaller carbon footprint.

They cost $3,500 to $10,000 (CAD 4,500 to CAD 13,000).

Septic Tank Materials

Another factor influencing cost is what your septic tank is made from. Here are some of the most common materials:

Concrete

Concrete tanks are the most common type of septic tank because they’re durable. Properly maintained, they can last 20 to 30 years. However, concrete may crack over time. Reinforcing the concrete with rebar helps increase its strength under pressure. Installation is more challenging, and extensive equipment is needed because of its weight. According to HomeGuide, the cost for an average-sized concrete tank is between $700 and $2,000 (CAD 900 to CAD 2,600).

Fiberglass

Fiberglass doesn’t weaken when used underground, and it’s nonporous, so it won’t attract algae growth. Installation is easier because the tank is light. Unlike concrete, it won’t expand or contract, so you don’t have to worry about cracking. The average fiberglass tank costs $1,600 to $2,000 (CAD 2,000 to CAD 2,600).

Plastic

Plastic tanks are light and easy to install. They’re also quite durable. Depending on the type, plastic tanks cost $800 to $2,000 (CAD 1,000 to CAD 2,600), on average.

Steel

Despite steel’s strength and durability, septic tanks made of steel can rust and collapse if not properly cleaned. As a result, some local authorities have increased regulations to discourage their use. You’ll usually find them in areas where the system already existed. If you can get one installed, they cost $500 to $2,500 (CAD 650 to CAD 3,200), according to Remodeling Expense.

What Size Septic Tank Do You Need?

Septic tank size is typically determined by the number of bedrooms your home has. This is used as a way to estimate how much water will flow through the system daily. Generally, the larger the system, the higher the cost.

Two Bedrooms

A two-bedroom house requires a septic system with a minimum of a 750-gallon septic tank. However, in many municipalities, a 1,000-gallon tank is the smallest size allowed.

Three Bedrooms

A three-bedroom house will need a minimum of a 1,000-gallon water tank, which regularly handles about 360 gallons of water per day.

Four Bedrooms

A four-bedroom home requires a larger tank with a minimum volume of 1,250 gallons. It handles around 480 to 600 gallons of water per day.

More Related Articles:

Septic Tank Repair Costs

It’s possible your entire septic tank doesn’t need to be replaced, just a specific part. Repairs and replacement parts can cost far less than a full system replacement.

Drain Field

Drain fields can overload and flood, causing a backup of sewage in toilets and sinks. Drain or leach field replacements cost $1,000 to $5,000 (CAD 1,300 to CAD 6,500), according to data from Fixr.

Tank Pump

Usually, a replacement septic tank pump costs $250 to $1,500 (CAD 320 to CAD 1,900).

Tank Filter

The tank filter is the most common replacement done by homeowners. It usually costs $200 to $300 (CAD 260 to CAD 390)

Tank Lid

Over time, concrete covers may crack, and steel lids may rust. You can typically replace a septic tank lid on your own for $150 to $500 (CAD 190 to CAD 650). It costs a bit more to have it replaced by a professional.

Tank Baffle

Baffle directs wastewater through the septic tank. Expect to pay $300 to $900 (CAD 390 to CAD 1,160) to repair a tank baffle.

Additional Factors to Consider

A septic tank can either be installed under or above the ground. Installing a tank underground is costly because of the digging and footing preparation involved.

Underground septic tanks require a drain field that can be fitted with a soakaway. The soakaway makes the tank require less emptying because it allows for some of the wastewater to filter into the ground. This can reduce your spending over time.

Different jurisdictions require different permits. Some require that an inspector visit and approve the site, which could entail a fee. Septic tank permits vary from state to state, but in general, you’ll need to pay renewal fees upon the expiry of your permit.

How Long Does a Septic Tank Last?

A septic tank’s lifespan varies depending on the material and type of system installed. Clogging caused by roots or flooding from groundwater can decrease the septic tank’s lifespan. On average, septic systems last 15 to 20 years.

Regularly servicing your septic tank is the best way to increase its longevity. It’s important to note that servicing is more than just pumping out the tank; it’s also necessary to have a professional inspect your tank regularly and perform routine maintenance.

All CAD conversions are based on the exchange rate on the date of publication.

6 Common Reasons Why Your Toilet Won’t Flush

6 Common Reasons Why Your Toilet Won’t Flush

The worst feeling is going to flush your toilet bowl and realizing the toilet water won’t go down. Is it going to overflow? Is the toilet clogged? When you see this happening, your first instinct might be to start panicking. However, there’s no reason to get stressed. A toilet that won’t flush is actually a really common issue that’s usually easy to repair. Our guide will explain some of the main reasons for toilet clogs, so you can fix the problem as quickly as possible. Remember that with all home DIY projects, safety is important. If you don’t feel comfortable doing a task, it’s best to leave it to a professional plumber.

The Toilet Won’t Flush Right Due to a Problem With Your Toilet Handle

When you try to flush your toilet, does the handle go down but nothing happens? This is usually good news because it’s often one of the easiest issues to fix. Typically, if you aren’t hearing or seeing any water move when you press the handle, it just means your toilet handle is disconnected.

Inside of the toilet tank, the flushing handle is connected to a little arm and chain that lift the flapper. When you press the handle, the toilet flapper raises, and water is dumped into the bowl. Little things like a broken link in a chain or a loose nut can disconnect the handle from the flapper. Fixing it is as basic as reconnecting a couple of basic parts.

The Toilet Won’t Flush Because Your Tank’s Water Level Is Too Low

When there isn’t enough water in the tank, the toilet can’t flush because it can’t dump enough water in the bowl. To check if this is the problem, look in the back of the toilet tank. The water should be about one inch below the top of your overflow tube. In many cases, this is pretty easy to deal with.

Sometimes, it’s as basic as just twisting the flush valve. If your toilet’s water intake valve was bumped, it might not be getting the water it needs to flush. In other cases, the float ball might’ve been adjusted improperly, causing it to sink too low and signal the tank is full before it really is. In some cases though, the root cause of this might be water pressure problems, pipe leaks, or other problems that require help from a plumber.

Toilet Water Won’t Stop Running Because of a Flapper or Fill Valve Problem

Does your toilet start to flush just fine but then won’t stop constantly running? This turns into a problem because it makes it hard to flush the toilet again in the future. A running toilet is also an issue because it can waste quite a bit of water.

Often, the underlying reason for this is that your flapper seal is bent or cracked. You may need to replace it, which is a fairly fast and easy repair. Another potential problem is hard water buildup inside of your fill valve, which can keep it from shutting off properly. After watching a couple of tutorials, it can be easy to flush the fill valve yourself, but you may want to get help from a plumber if you’re new to DIY, just to be on the safe side.

Your Toilet Is Clogged

In many cases, the problem isn’t the toilet itself. Instead, the issue is a clog inside the toilet. Toilets are only designed to handle certain types and amounts of waste. It can be pretty easy for them to get clogged with items like sanitary products, a toy your kid dropped in the bowl, or just a large amount of toilet paper.

If you have a toilet clog, you obviously know. If there’s a something in the bowl that just won’t go down, you probably have a clog. Small clogs fairly close to the surface can be dealt with yourself. You might just be able to plunge it or poke it with a toilet brush to get things moving again. For more stubborn clogs, you or your plumber may need to use a toilet auger to get in there and unclog the toilet.

You Have a Drain Line Problem

It’s possible for everything in your toilet to be functioning perfectly, but your toilet still won’t flush at all. This means the problem lies deeper inside your plumbing. The drain lines that move waste to your sewer or septic can experience all sorts of issues. If a drain line malfunction is the cause of your toilet that won’t flush, you may notice drains not working all over the house. Your sinks, showers, and tubs may get water backing up into them, or they might all drain slowly.

Just like a toilet, your drain line itself can be clogged. You may need a plumber with an extra-long auger to come out and clean it. If the drain line is broken or leaking, it can also keep your toilet from flushing. Trees and other roots from your yard can grow into the drain line, too, which may require replacing the entire drain line section.

Ultimately, there are all sorts of reasons for a toilet that won’t flush. Some of these problems are fast and easy to fix yourself, while others will require help from a licensed plumber. Help protect yourself from the hassle and costs associated with plumbing repairs by having a plan from Service Line Warranties of Canada. With a plan, we will pay for covered repairs up to the benefit amount, so you don’t have to deal with unexpected expenses. Once the problem arises, you can call our 24-hour repair line and we’ll send an expert technician to come help you.

8 possible reasons why you have no Hot Water

8 possible reasons why you have no Hot Water

8 Things to Consider If You Have No Hot Water in Your Home

When you turn on your sink or shower, you expect hot water to come out. Finding no hot water and having to take a cold shower streaming out can be unpleasant in more ways than one. In addition to the shock of the ice cold water, you might also start to worry about the energy efficiency of your water heater or if you have a natural gas leak. Before you let your mind go to the worst case scenario, rest assured there are many reasons as to why there is no hot water in your home. To start troubleshooting, find out if your home has a gas or electric water heater. Here are some common reasons for water problems and how to fix them.

1. Leaking Tank

In order for a water heater to do its job, there has to be water in the tank. If there is no hot water, it probably means that the tank is leaking. An empty tank is a serious problem and is not at all energy efficient. Inspect the connections between the appliance and its valves as well as the pipes. If those are secure, check the tank’s compartment. If there is water in the compartment, it’s most likely time to replace the appliance.

2. Gas Leak

A natural gas leak coming from your water heater is inconvenient as well as dangerous. If you suspect that gas is leaking, call your gas company as soon as possible. The gas company’s technician is a professional, but his focus is not to repair your hot water heater. The next steps depend on his assessment of the appliance. If there is a natural gas leak, the gas company will work on solutions in their realm. If there is no gas leak, your troubleshooting journey continues.

3. Electric Water Heater Malfunction

Energy efficiency is important when it comes to your water heater. Both an electric and a gas water heater can be effective at making sure you don’t wake up to no hot water in the house. But do you know the difference between a gas and electric water heater? The electric version, obviously, relies on electricity. If your home has no hot water, turn off the heater first. Then, reset the circuit breaker. If the breaker tripped, your home will receive hot water again after about an hour. A circuit breaker that continues to trip is a bad sign, so hit the reset button. If there is still an issue, speak with a qualified electrician.

4. Failing Gas Valve

Those who have a gas water heater and have no hot water should check the appliance’s supply line. If there are no leaks, take a look at the gas valve. It must be secure and in the correct place. Then, double-check that the gas is on. If the gas valve is good to go, investigate the pilot light. You may need to re-light the pilot several times. It must stay lit. If it doesn’t, the gas line could be the culprit because it is impeding the gas supply.

When none of these steps deliver hot water in an hour, it may be time to invest in an energy efficient new water heater. To be sure, call the professionals.

Keep in mind that there are additional costs to consider when replacing your water heater, and most homeowners choose between a traditional or tankless water heater.

5. Malfunctioning Thermostat

In order for a water heater to produce hot water and be energy efficient, the thermostat must be set between 122 and 140 degrees Fahrenheit. If there is no hot water or the supply is not adequate or is too hot, check the upper thermostat. If the thermostat is busted, it should be replaced. Lack of regular maintenance can cause issues even though the thermostat is working because of sediment buildup. To fix this, flush your water heater.

6. Tank Size

If your tank is too small, your household is not going to be energy efficient and is going to run out of hot water faster. Maybe the appliance did its job when it was just you and your spouse. As your family grew, however, so did the demand for hot water and a lot more hot showers. This means it’s time for a larger hot water tank. When upgrading, keep in mind that electric water heaters take longer than gas water heaters to heat.

7. The Weather

The outside temperature determines how quickly water can be heated. Even in regions like the Southwest, the energy efficiency and performance of water heater tanks can suffer in the winter. If you live in an area that experiences cold snaps, this can impact your system and cause water problems. You may need to ride out the cold and then insulate the appliance.

8. Recommended Tools and Materials

Those who would want energy efficiency in the home, you may want to replace or repair the home’s water heater by yourself. We always recommend allowing a qualified electrician to take care of the job. However, if you enjoy attempting a DIY project and have some experience, you will need such tools as:

  • Screwdriver
  • Wrench
  • Electrical and plumbers tape
  • Safety glasses
  • Soldering torch
  • Tube cutter

Any other tools will depend on the type of heater you have.