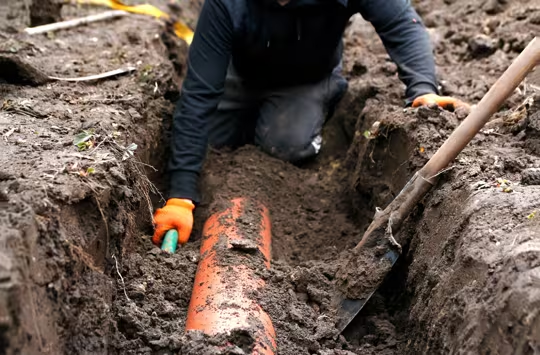
How Deep Are My Water and Sewer Lines Buried?

How Deep Are My Water and Sewer Lines Buried?

If you’re planning to dig anywhere on your property — whether you’re installing a fence, planting a tree or tackling a landscaping project — knowing what’s buried beneath your yard and how far down it is matters a lot.

This May Also Interest YoThis May Also Interest You: How Much Does It Cost to Repair or Replace a Water Service Line?

Hitting a water or sewer line with a shovel is the kind of mistake that turns a simple weekend project into an expensive emergency. Here’s what you need to know about typical plumbing burial depths, and why they vary so much depending on where you live.

The Short Answer

Water lines are generally buried between 18 inches and 6 feet deep, depending on the climate. Sewer lines typically run deeper — anywhere from 18 inches to 6 feet or more — though they tend to get deeper the further the line runs from the house, since they rely on gravity to move wastewater toward the municipal connection or septic system.

The single biggest factor in both cases is the frost line — the depth to which the ground freezes in winter. Water in a frozen pipe expands, and expanding water breaks pipes. In areas where the ground freezes, water lines have to be buried below the frost line to stay protected. Sewer lines are less vulnerable to freezing because wastewater is warm and moving, but they still benefit from deeper burial in colder climates.

Frost Depth Varies By State

Midwest (Northern States)

This is where frost line depths get serious. In states like Minnesota and North Dakota, the frost line can reach five to seven feet or deeper in particularly harsh winters. Water lines in these states are typically buried 5 to 6 feet down, sometimes more. Sewer lines follow a similar pattern. If you live in the northern Midwest and you’re planning to dig, assume there’s a lot of material between you and your utility lines.

Northeast

Frost depths in the Northeast vary considerably from southern Connecticut to northern Maine. In southern New England, frost lines typically reach three to four feet. In northern states like Vermont, New Hampshire, and upstate New York, that extends to four to five feet. Water lines are buried accordingly, and sewer lines generally run at similar or greater depths.

South (Warmest States)

Warm climates change the calculation dramatically. In Florida, where the ground essentially never freezes, water lines are often buried as shallow as 12 to 18 inches. Texas varies more — southern Texas has minimal frost concerns, while the northern part of the state can see occasional hard freezes and accordingly deeper burial depths. Across most of the South, you’ll find water lines at 18 to 24 inches, and sewer lines at similar or slightly greater depths. The comparatively shallow burial in warm climates is precisely why a rare hard freeze can cause widespread pipe damage in states like Texas that aren’t built for it.

Northwest

The Pacific Northwest is milder than its northern latitude might suggest, thanks to the moderating influence of the Pacific. In coastal areas of Washington and Oregon, frost lines are relatively shallow — often just 12 to 24 inches — and water lines are buried accordingly. Move inland toward eastern Washington or Oregon, where temperatures drop considerably more, and burial depths increase to three feet or more.

Southwest

Much of the Southwest — Arizona, Nevada, New Mexico, southern California — has minimal frost concerns, and water lines in these areas are often buried at 18 inches or less. At higher elevations in states like New Mexico and Colorado, frost becomes a real factor. Depths increase accordingly, sometimes reaching 3 to 4 feet.

Know Water and Sewer Line Depth Before You Dig

Knowing approximate regional depths is useful, but it’s not a substitute for knowing exactly what’s in your specific yard before you start digging. Call 811 — the national “Call Before You Dig” service — at least a few business days before any excavation project. It’s free, it’s required by law in most states, and utility companies will come out and mark the locations of buried lines on your property. The markings tell you where the lines are horizontally, though they won’t tell you exactly how deep. For anything more than shallow digging, a plumber or excavation contractor can help you determine the actual depth before specialized tools and shovels start breaking ground.
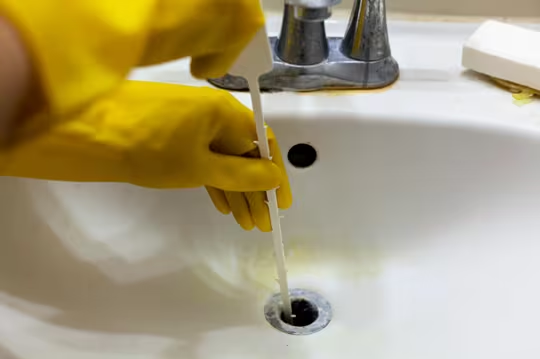
9 Times You Should NOT Use a Drain Snake

9 Times You Should NOT Use a Drain Snake

Drain snakes, also known as drain augers, can be a handy tool for dislodging stubborn clogs. But they’re not a one-size-fits-all solution. In some cases, using a drain snake can actually cause more harm than good. Whether you’re dealing with fragile pipes, sensitive fixtures or clogs caused by something a snake won’t reach, it’s important to know when not to reach for this tool.

This May Also Interest You: How to Use a Drain Snake to Unclog Your Toilet

Do Not Use a Drain Snake if …

1. You Have Fragile or Older Pipes

If your plumbing system is older, particularly if it’s made from brittle materials (like clay, galvanized steel or thin copper), a drain snake can puncture or collapse the pipe. Forceful use of a metal auger can scrape the inside of deteriorating pipes, accelerating their breakdown. Instead, use a non-invasive method like a pressurized water bladder attached to a garden hose or call a plumber for a camera inspection and potential hydro jetting. If the clog is minor, enzymatic drain cleaners may help dissolve organic matter without physical abrasion.

2. There’s a Risk of Porcelain Damage

Snaking through toilets or bathroom sinks with metal augers can scratch or chip porcelain. This is especially problematic in toilets, where scratches on the bowl can harbor bacteria and cause aesthetic damage. For toilet clogs, use a flange plunger designed to form a tight seal at the base of the bowl. If that fails, use a toilet auger, which is a type of snake with a protective rubber sleeve and curved guide tube to prevent scratching. For sinks, try a plastic barbed hair remover or a gentle suction device.

3. The Clog Is Caused by Non-Organic Material

Drain snakes work best on soft, organic clogs (like hair or grease). If your blockage is caused by items like dental floss, toys, hardened soap or mineral deposits, a snake may either miss the obstruction or push it further down, worsening the clog. Instead of using a drain snake, disassemble the P-trap beneath your sink to manually remove the obstruction. In deeper cases, professional hydro jetting or pipe descaling may be necessary.

4. You’ve Already Used Chemical Drain Cleaners

Chemical cleaners can linger in the pipes and splash back when using a snake, posing a serious chemical burn hazard. The heat generated by caustic agents like lye can also weaken plastic piping, increasing the risk of structural damage when snaking. If you’ve already added chemical cleaner, flush thoroughly with water and wait at least 24 hours before attempting anything else. If the drain remains clogged, call a plumber who can safely remove the blockage.

More Related Articles

5. The Drain Is Completely Blocked with Standing Water

While snakes are meant to clear clogs, they can have trouble when faced with full drainpipe backups. The water makes it difficult to tell where the clog begins, and forcing a snake through without visual confirmation can compact the clog further. To resolve this situation, start by bailing out the water using a small cup or bucket. Then try a plunger with a tight seal or a wet/dry vacuum on reverse to pull the clog out.

6. The Drain Serves a Garbage Disposal

Garbage disposals contain blades and mechanical components that can be damaged by a snake, and damage the snake itself. Instead of a snake, disconnect the disposal unit and access the clog from the adjacent drain line, or check the reset switch. In some cases, clogs can be resolved by flushing with hot water and dish soap.

7. You’re Not Sure What’s Down There

Guessing the source of a clog can be risky – especially when deeper, more serious problems could be lurking. Issues like tree roots, collapsed or misaligned pipes or non-organic blockages (like construction debris) are not something you want to discover with a metal auger.

A metal snake isn’t just ineffective against these types of obstructions. It can make things worse. For example, hitting tree roots with a snake won’t clear them, but it can get tangled in them and make removal difficult or impossible without professional tools. If the pipe is collapsed, forcing a snake through it may jam the auger inside the damaged area or worsen the break, leading to more extensive repair costs. In some cases, the snake may even break off inside the pipe, creating an even larger obstruction.

If you’re not certain what’s causing the clog (especially if multiple drains are slow, backing up or inconsistent), call a plumber for a camera inspection before attempting any mechanical tools. This will help you pinpoint the issue without making it worse.

8. The Clog is in a Shower Drain Lined with Tile or Delicate Finishes

Snakes can scratch delicate tile or damage decorative drain covers. Aggressive snaking can also shift seals in shower pans. Try a flexible plastic drain cleaning tool or a natural solution of hot water, baking soda and vinegar instead. For persistent clogs, a plumber can use a non-damaging vacuum or mini hydro-jet.

9. The Blockage is in a Vent Stack

A vent stack is a vertical pipe that runs up through your home and exits through the roof. It allows air to enter the plumbing system, which maintains proper pressure and enables wastewater to flow smoothly through the drainpipes. It doesn’t carry water, only air and sewer gases.

Symptoms of a vent stack blockage include gurgling drains, slow drainage across multiple fixtures, water backing up in one fixture when another is used (e.g., toilet bubbling when the washing machine drains) and sewer smells in the house. These issues suggest airflow is restricted, preventing proper pressure regulation in the pipes.

Vent stacks usually exit through the roof, and clogs (like leaves, bird nests or ice) don’t respond well to snaking from below. Forcing a snake upward can damage fittings or push debris deeper, compounding the issue.

Use a shop vac from the rooftop (only if it’s safe to access) to try to pull the obstruction out. If the issue persists, call a professional who can safely access the vent and use appropriate tools, like blow bags or inspection scopes.

When to Call a Plumber

If you’ve tried basic home remedies and still have a clog or you’re not sure what you’re dealing with, it’s best to call a plumber. Professionals can use scoped cameras, targeted jetting and safe mechanical devices to fix clogs without damaging your pipes.

What’s a ‘Cold Water Sandwich’ and Why Does It Happen?

What’s a ‘Cold Water Sandwich’ and Why Does It Happen?

If you’ve got a tankless water heater and you’ve ever been standing in the shower when the water suddenly turns cold for a few seconds — then goes right back to hot, as if nothing happened — you’ve experienced what plumbers call a “cold water sandwich.” It’s a real, well-documented quirk of tankless systems, and understanding why it happens is the first step to stopping it.

This May Also Interest You: Do I Need a Water Heater Recirculation Pump?

What Is the Cold Water Sandwich Effect?

The name describes exactly what it feels like: a layer of cold water sandwiched between two layers of hot. You turn on the shower, hot water arrives, you’re comfortable — and then, without touching anything, a brief blast of cold water interrupts the flow before it returns to hot again on its own.

It’s most commonly reported when someone turns the hot water on, off and back on again within a short window — for example, someone showers, steps out briefly and steps back in, or two people use hot water fixtures back to back in different parts of the house. It can also happen on the very first draw of hot water after the system has been idle.

Why Your Tankless Water Heater Goes Cold After a Few Minutes

To understand the cold water sandwich, it helps to know how a tankless water heater actually works. Unlike a tank system that keeps a reservoir of hot water always ready, a tankless unit heats water on demand as it flows through a heat exchanger. A flow sensor inside the unit detects when water starts moving through the pipes and triggers the heating element or gas burner to fire up.

Here’s where the sandwich comes from. When you first turn on a hot water tap, there’s a brief lag between when water starts flowing and when the heater actually ignites and starts heating it — the water sitting in the pipe from the last use, plus whatever cold water was sitting in the line, passes through before the newly heated water catches up. If the tap is turned off and back on again quickly, that same sequence repeats: a slug of lukewarm or cold water that was sitting in the line — left over from the brief pause — gets pushed through before the heater catches back up and hot water resumes.

Every tankless heater also has a minimum activation rate — a minimum flow rate required to trigger the unit to fire up at all. If water flow briefly drops below that threshold — which can happen when another fixture in the house turns on or off and changes the pressure dynamics in the system — the heater can shut off momentarily and then need to re-ignite, creating the same cold gap in the meantime.

More Related Articles:

How Do You Fix or Prevent a Cold Water Sandwich?

A few approaches can reduce or eliminate the cold water sandwich, depending on how much you’re willing to invest in the fix.

Install a Recirculation Pump

This is the most effective solution for homes that experience this regularly. A recirculation pump continuously circulates a small amount of hot water through the pipes, keeping the line primed with hot water even when no fixture is actively running. This eliminates the cold slug that would otherwise sit in the pipe waiting to be pushed out. Many tankless systems support recirculation pumps as an add-on, and some models come with one built in.

Add a Small Buffer Tank

Some homeowners pair their tankless system with a small buffer tank — essentially a compromise between a traditional tank heater and a fully tankless system. The buffer tank holds a small reserve of hot water that smooths out the gap while the tankless unit catches up to demand, largely eliminating the cold water sandwich effect.

Avoid Quick On-Off-On

This isn’t a permanent fix, but knowing the cause helps in the moment. If you know turning the water off and back on quickly triggers the issue, giving it a few extra seconds before turning it back on can sometimes help the system catch up more smoothly.

Check Your Minimum Flow Rate

If the cold water sandwich happens frequently and isn’t related to quick on-off cycling, it may be worth having a plumber check whether your fixtures are delivering enough flow to reliably trigger the heater. Low-flow showerheads, in particular, can sometimes sit right at the edge of a unit’s minimum activation threshold.

Won’t a Slow Drain Just … Fix Itself Over Time?

Won’t a Slow Drain Just … Fix Itself Over Time?

A sluggish sink, bathtub or shower drain might seem like a minor inconvenience — something you can live with or hope will resolve on its own. But like most plumbing issues, a slow drain is your home’s way of raising a red flag.

This May Also Interest You: How to Unclog a Bathroom Sink With a Sink Stopper

Ignoring it could let a small, manageable problem become something more costly and disruptive. Read on to learn what causes a slow drain, why it shouldn’t be ignored and how to fix it before it turns into a serious plumbing issue.

What Happens If You Ignore a Slow Drain?

At first, a slow drain might just mean the water takes a few extra seconds to disappear. No big deal, right? But under the surface, ignoring that slowdown can trigger a chain reaction.

Blockages tend to worsen over time as soap scum, hair, grease and other debris accumulate. Eventually, what starts as a mild nuisance can become a full stoppage, leaving you with a sink or tub that won’t drain at all. When water has nowhere to go, it backs up. And that can lead to overflows, water damage and even mold growth in hidden areas.

Beyond the visible mess, slow-moving drains increase wear and tear on your plumbing. Stagnant water stresses pipes, may accelerate corrosion and can encourage mineral deposits to form. And if that water sits long enough, unpleasant odors and bacteria aren’t far behind.

Is a Slow Drain a Sign of a Bigger Problem?

Sometimes a slow drain is exactly what it seems: a localized clog caused by hair, soap residue or grease. But when the issue lingers, or affects multiple drains, it may point to something deeper within your plumbing system.

Here are a few larger problems a slow drain could be indicating:

  • Partial blockages deep in the line: These often don’t respond to surface-level fixes like plunging, and repeated backups may signal that your pipes are progressively narrowing from within.
  • Clogged vent pipes: A blocked vent can prevent proper drainage even if the pipe itself is clear. If you’re hearing gurgling noises from the drain, this may be the culprit.
  • Sewer line obstructions: Tree roots, debris buildup or pipe collapse in your main sewer line can slow every drain in the house, and foul odors are often the first noticeable sign.
  • Aging or poorly sloped plumbing: Corrosion, mineral scale or incorrect pipe angles can restrict flow and increase clog risk. When multiple fixtures begin acting up, your drainage system may be failing from the inside out.

What’s the Best Way to Unclog a Slow Drain?

The best solution depends on what’s causing the blockage and how deep it goes. For minor, surface-level clogs, several home remedies can be surprisingly effective if done correctly.

Hot Water Flush (Best for Kitchen Grease Clogs)

Hot water can help melt or dissolve congealed cooking fats and soap residue that have stuck to the sides of your drainpipes.

1. Heat a large pot of water until it’s steaming hot. Don’t allow it to boil, as that can damage PVC pipes.

2. Slowly pour the hot water directly into the drain in stages, allowing it to sit and work for 30 seconds to 1 minute between each pour.

3. Repeat the process two or three times to clear light grease buildup.

Baking Soda and Vinegar Reaction (Best for Clogged Bathroom Sink or Shower Drains)

This safe and chemical-free combo creates a fizzy reaction that can help loosen minor hair clogs and soap scum.

1. Pour about 1/2 cup of baking soda into the dry drain.

2. Follow it immediately with 1 cup of white vinegar.

3. Cover the drain with a plug or cloth to contain the reaction.

4. Let it sit for 15 to 30 minutes, then flush with hot (not boiling) water.

More Related Articles:

Plunging (For Visible or Shallow Blockages)

A standard cup plunger can create enough pressure to dislodge soft blockages in sinks and tubs.

1. Fill the sink or tub with enough water to cover the bottom of the plunger.

2. Position the plunger directly over the drain, forming a tight seal.

3. Plunge vigorously for 10 to 20 firm pumps while keeping the seal intact.

4. Quickly pull up the plunger and check water flow. Repeat as needed.

Manual Drain Snake (Best for Hair and Soap Gunk Within Reach)

A hand-cranked auger or even a plastic hair-snagging tool can be fed into the drain to physically break up or pull out clogs.

1. Insert the tool gently into the drain until resistance is felt.

2. Rotate (or wiggle, for plastic tools) to latch onto the clog.

3. Pull the clog back out slowly and discard it. Don’t push it farther down.

4. Flush the drain with hot water to clear residual debris.

Each method addresses different types of surface-level buildup. If none of them restore full drainage, or if the problem returns within days, the blockage is likely deeper and requires professional tools or inspection.

How Can You Prevent Slow Drains?

Take the following actions to prevent slow drains from occurring in the first place:

  • Use mesh drain strainers in sinks and tubs to catch hair, soap chunks and food scraps.
  • Never pour grease down the sink. Let it cool in a container and throw it in the trash.
  • Run hot water down drains after each use, especially in kitchens where oils and soap residues can congeal.
  • Flush with boiling water weekly to clear lingering residue before it sticks.
  • Keep an eye out for early signs like gurgling, minor bubbling or slowing water flow.